Water Filter Deliverables
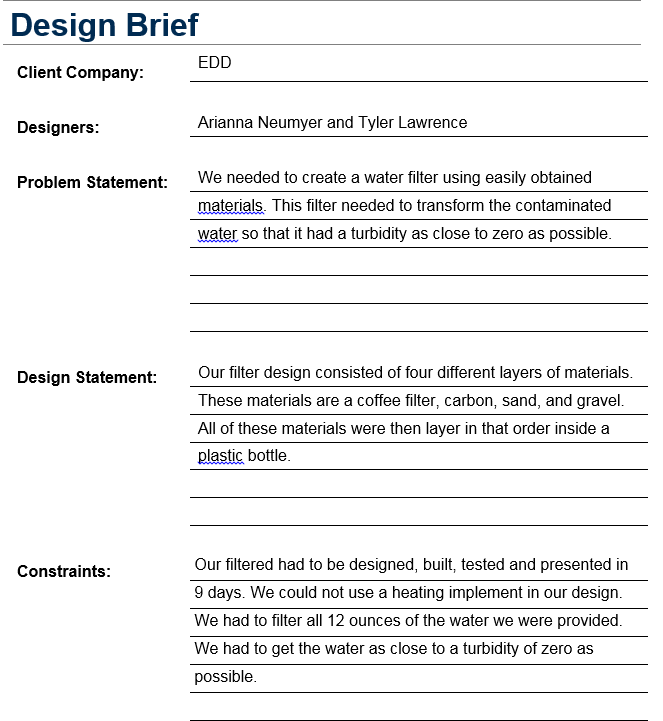
The goal of this project is to create a water filter. We must do so using only easily accessible materials. The design must also be easily used and portable. We could not use any kind of heating implement to purify the water. Based on these guidelines we had to try to filter the water to as close to a turbidity of zero as possible.
Project Management
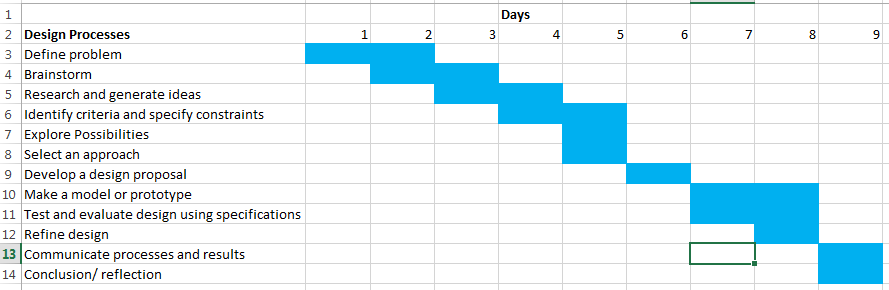
We had to complete the whole design process for this project in 9 days. Some days we would be able to complete two steps within a class period. Also this chart does not account for any time spent outside of class working on the project.
Gantt Chart
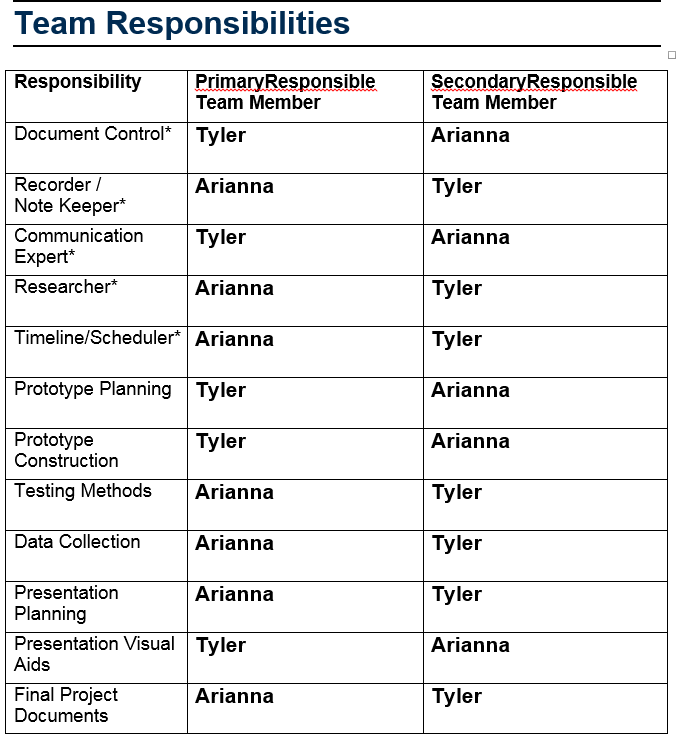
Team Responsibilities
Brainstorming
- Still
- Solar Still
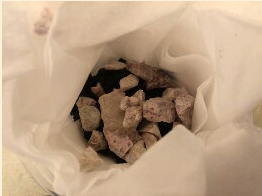
- 4 layer filter
- 8 layer filter
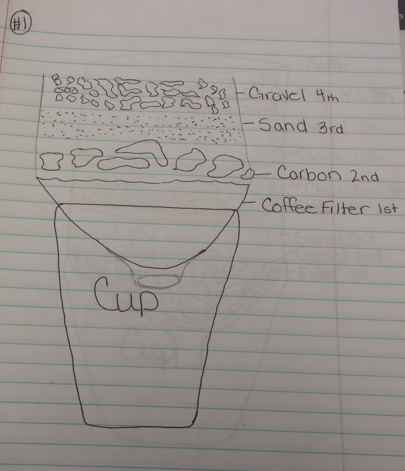
Sketches
Summary
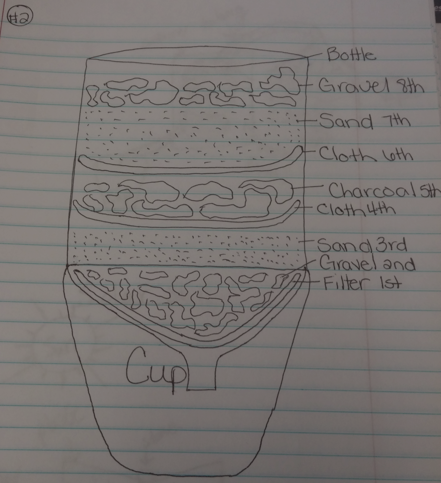
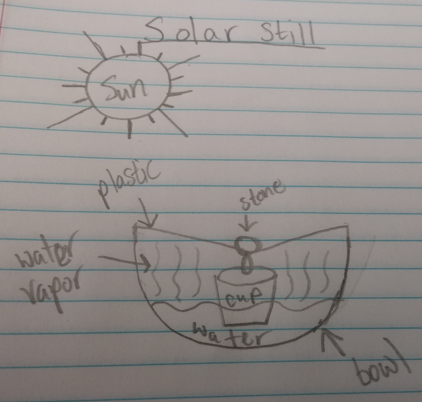
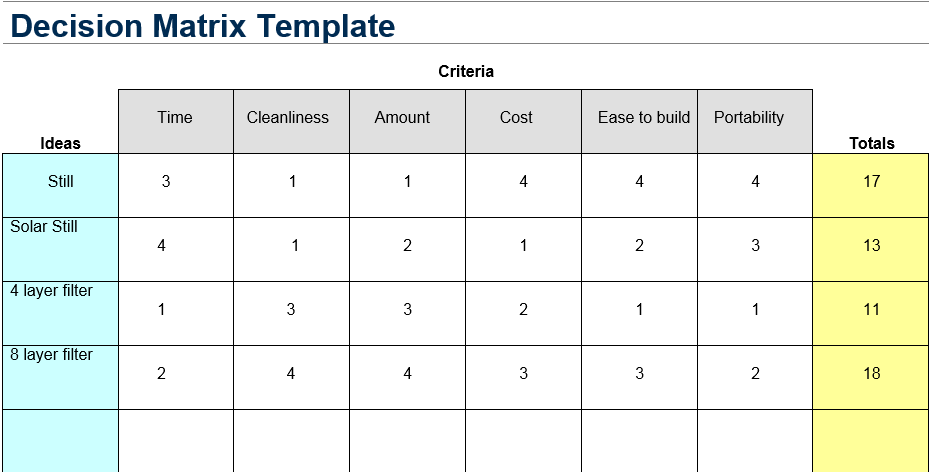
When we brainstormed we cam up with for different approaches to filtering water. These approaches included a 4 layer filter using coffee filters, gravel, sand and carbon. An 8 layer filter using coffee filters, gravel, sand, cloth, charcoal, cloth, sand and gravel layers. Distillation which would use a heating implement to create water vapor that would condensate and produce pure water. Finally there was the solar still which used the heat from the sun to create water vapor which would be caught by a layer of plastic where it would condensate. The water droplets would then be directed into a cup in the center of the container holding the dirty water by a stone set in the center of the plastic.
Pros
- 4 layer filter: cheap, lightweight, fast, portable
- 8 layer filter: filters better than 4 layer filter, portable
- Distillation: completely pure water, fairly fast
- Solar Still: completely pure water, low maintenance
Cons
- 4 layer filter: Doesn't filter extremely well
- 8 layer filter: takes more materials than 4 layer filter
- Distillation: not cheap, takes a while to create still, cant use a heating implement for this project.
- Solar Still: takes a long time to produce a large amount of product
Sources
- How to purify your water. (n.d.).Instructables.com. Retrieved September 12, 2014, from http://www.instructables.com/id/How-to-purify-your-water/
- How to Make a Water Filter. (n.d.).wikiHow. Retrieved September 12, 2014, from http://www.wikihow.com/Make-a-Water-Filter
- Water Purification | Practical Survivor. (n.d.). Water Purification | Practical Survivor. Retrieved September 12, 2014, from http://www.practicalsurvivor.com/waterfiltr
- Different water filtration methods explained. (n.d.). Different Water Filtration Methods. Retrieved September 12, 2014, from http://www.freedrinkingwater.com/water-education/quality-water-filtration-method.htm
Design Brief
Materials Testing
- Coffee filter: catches some of the medium sized particles but lefts a lot still pass through.
- Tissue: Catches a lot of particles and lets water pass through it easier than the coffee filter.
- Under armor material: catches a little bit of everything.
- Sponge: captures a lot of the small particles but absorbs a lot of the water.
Design Matrix
Annotated sketches


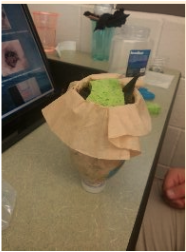
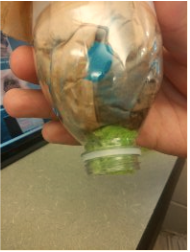
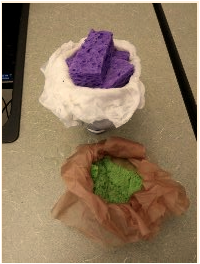
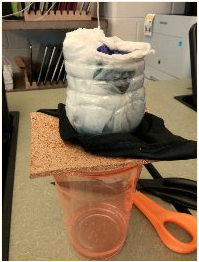
Prototype
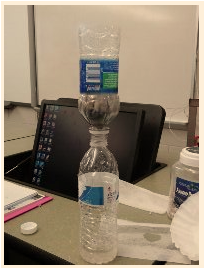
Prototype 1 consisted of a plastic water bottle with a filter, carbon, sand and gravel layers. We realized that the bottle was too long and water was escaping to the outside of the filter, so we would need to fix that next time.This filter achieved a turbidity of 87.6
Prototype 2
Prototype 3
Prototype 4
Prototype 5
Prototype 6
Prototype 7
Prototype 8
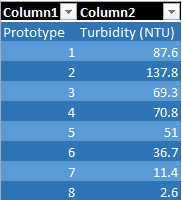
Results
Note: for the final prototype we had to use a different sample to calibrate the turbidity so there is likely to be error there.
Findings
During this project we found out that the sponge works really well for filtering but absorbs a lot of the water making the filtering process slower. We also found out that if we used tissues we could not layer them too thick or they would not want to filter the water. Also we found out that a lot of the materials would want to leave behind their own fibers in the product which increased the turbidity. The under armor material helped in eliminating the fibers left by the tissues and other materials. Finally we found out that it was difficult to hold both the filter and the cup for the filtered water at the same time so we devised a way to make it hands free.
Revisions
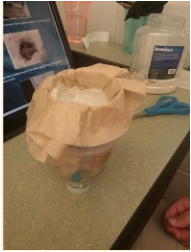
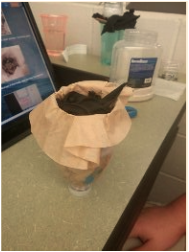
Prototype 2 added an extra layer of carbon, gravel and sand, as well as a shortened bottle.Prototype 3 added a layer of dryer sheets, carbon and tissue.Prototype 4 added a layer of under amour material.Prototype 5 added a tissue and sponge.Prototype 6 added sponge to the spout of the water bottle. Prototype 7 added a top section containing coffee filters and an extra sponge.Prototype 8 got rid of the top section added in prototype 7 and added a layer of the under armor material on the spout, and a cork holder.
Conclusion
During this project we were tasked with creating a water filter that got as low a turbidity as possible using readily available items. in order to do this we had to go through every step of the design process. I learned that it helps to test each of the materials before you create your prototype so that you know the pros and cons of each. I also realized that a design matrix really helps you decide your approach. Next time I think that I would create a design that I could use indoors so I wouldn't get rained on. I think that next time you should have an example of a go i roject so that you have something to compare to.
